Role Details
Overview
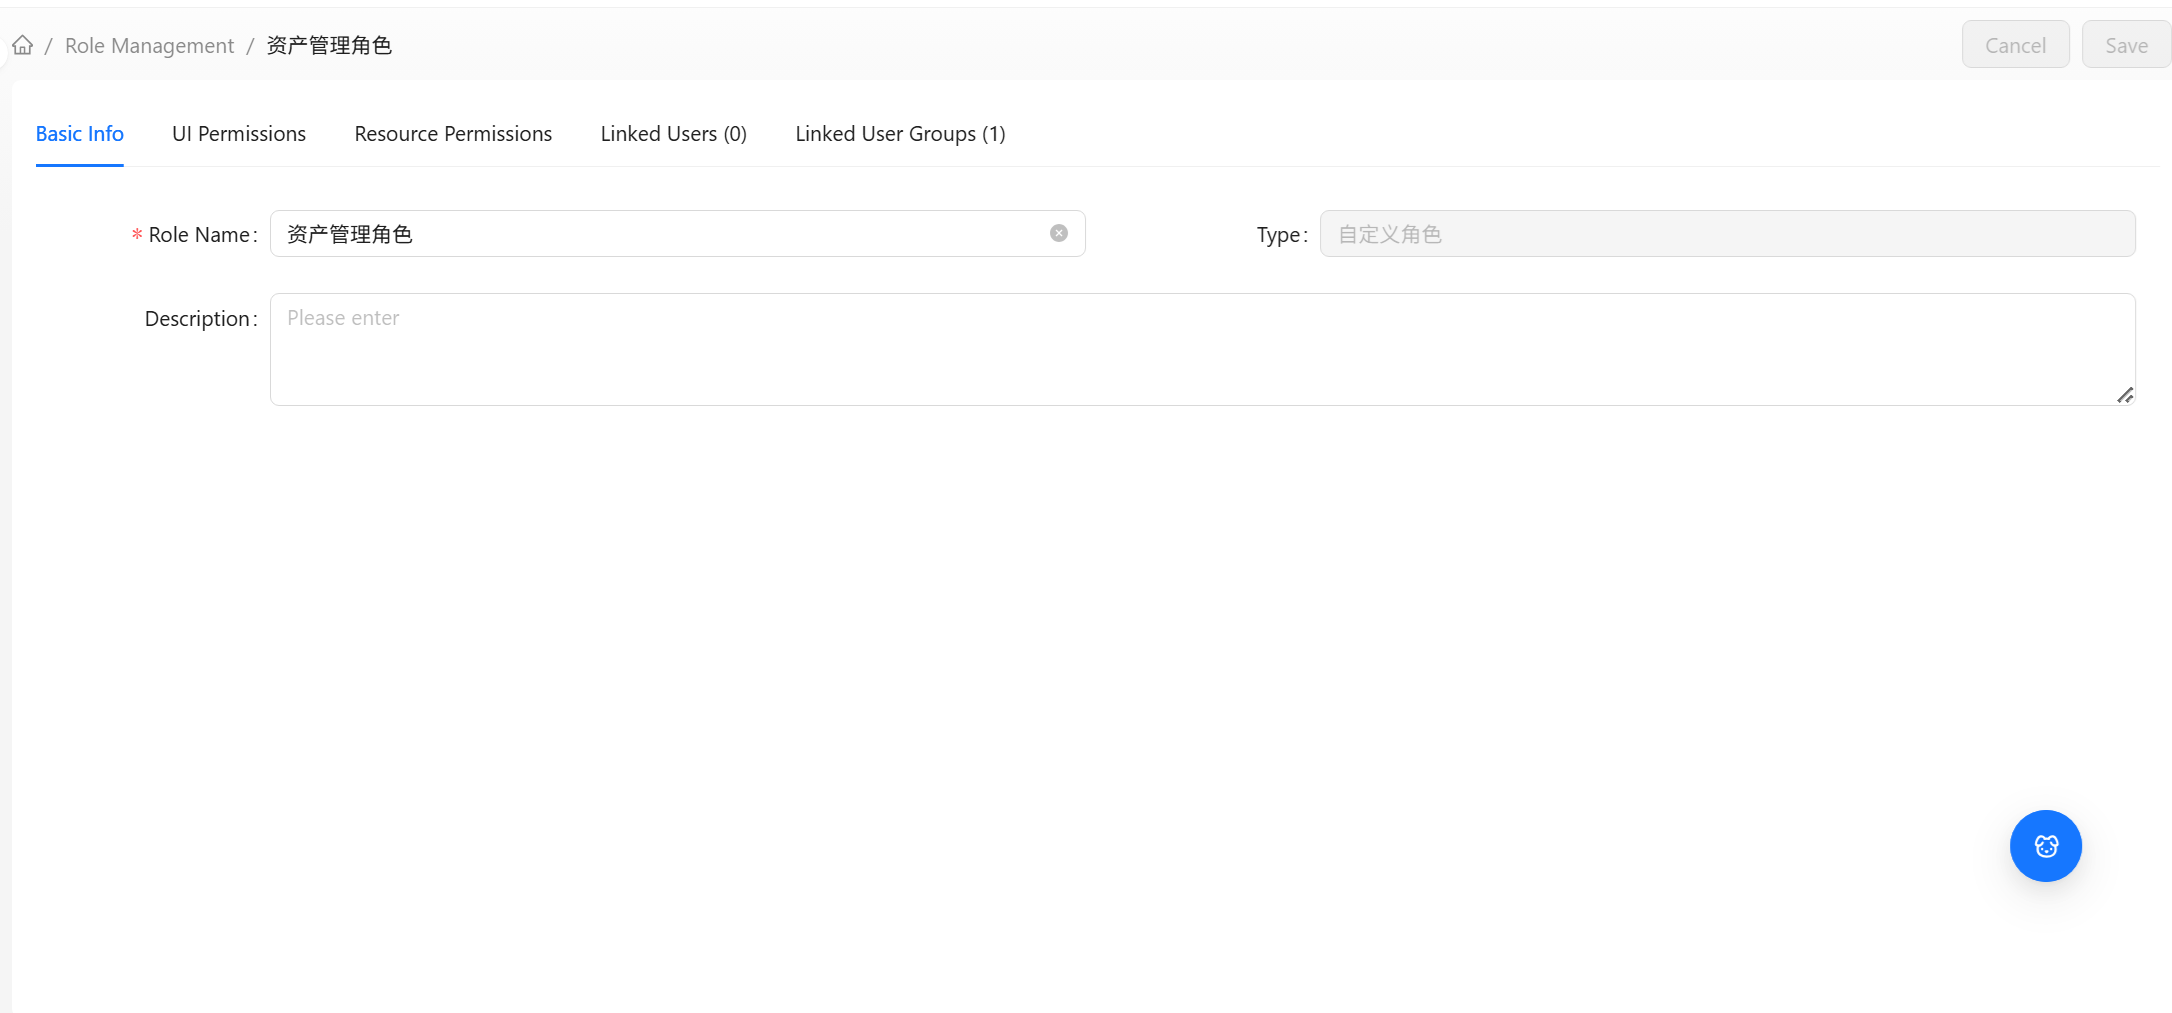
Click a role name in the Role Management list to enter that role's details page. This is the central place for configuring permissions: five tabs are used to manage the role's basic information, UI permissions, resource permissions, associated users, and associated user groups.
Page Layout
The Role Details page is divided into a top action bar and a tab area.
Top Action Bar
| Button | Function |
|---|---|
| Cancel | Discards all unsaved changes (including basic information, UI permissions, and resource permissions) |
| Save | Submits all three types of changes — basic information, UI permissions, and resource permissions — at once |
Changes to basic information, UI permissions, and resource permissions are all submitted together via the Save button at the top. You can make adjustments across multiple tabs and then click Save from anywhere. Operations in the "Associated Users" and "Associated User Groups" tabs (add/remove/associate/disassociate) take immediate effect and do not require clicking Save.
Tab Overview
| Tab | Content | Effective |
|---|---|---|
| Basic Information | Role name, type, description | Requires Save click |
| UI Permissions | Controls visible navigation menus | Requires Save click |
| Resource Permissions | Controls access level for each resource | Requires Save click |
| Associated Users | Users directly assigned this role | Immediate |
| Associated User Groups | User groups associated with this role | Immediate |
All tabs for system roles (e.g., System Administrator, Read-Only User) are read-only, and the Save button is not displayed. If you need a different combination of permissions, please create a custom role.
Basic Information
Used to view and modify the role's basic attributes.
Field Descriptions
| Field | Required | Description |
|---|---|---|
| Role name | Yes | Role name |
| Type | — | Read-only; shows "System Role" or "Custom Role" |
| Description | No | Description of the role's purpose |
After making changes, click Save at the top to apply.
UI Permissions
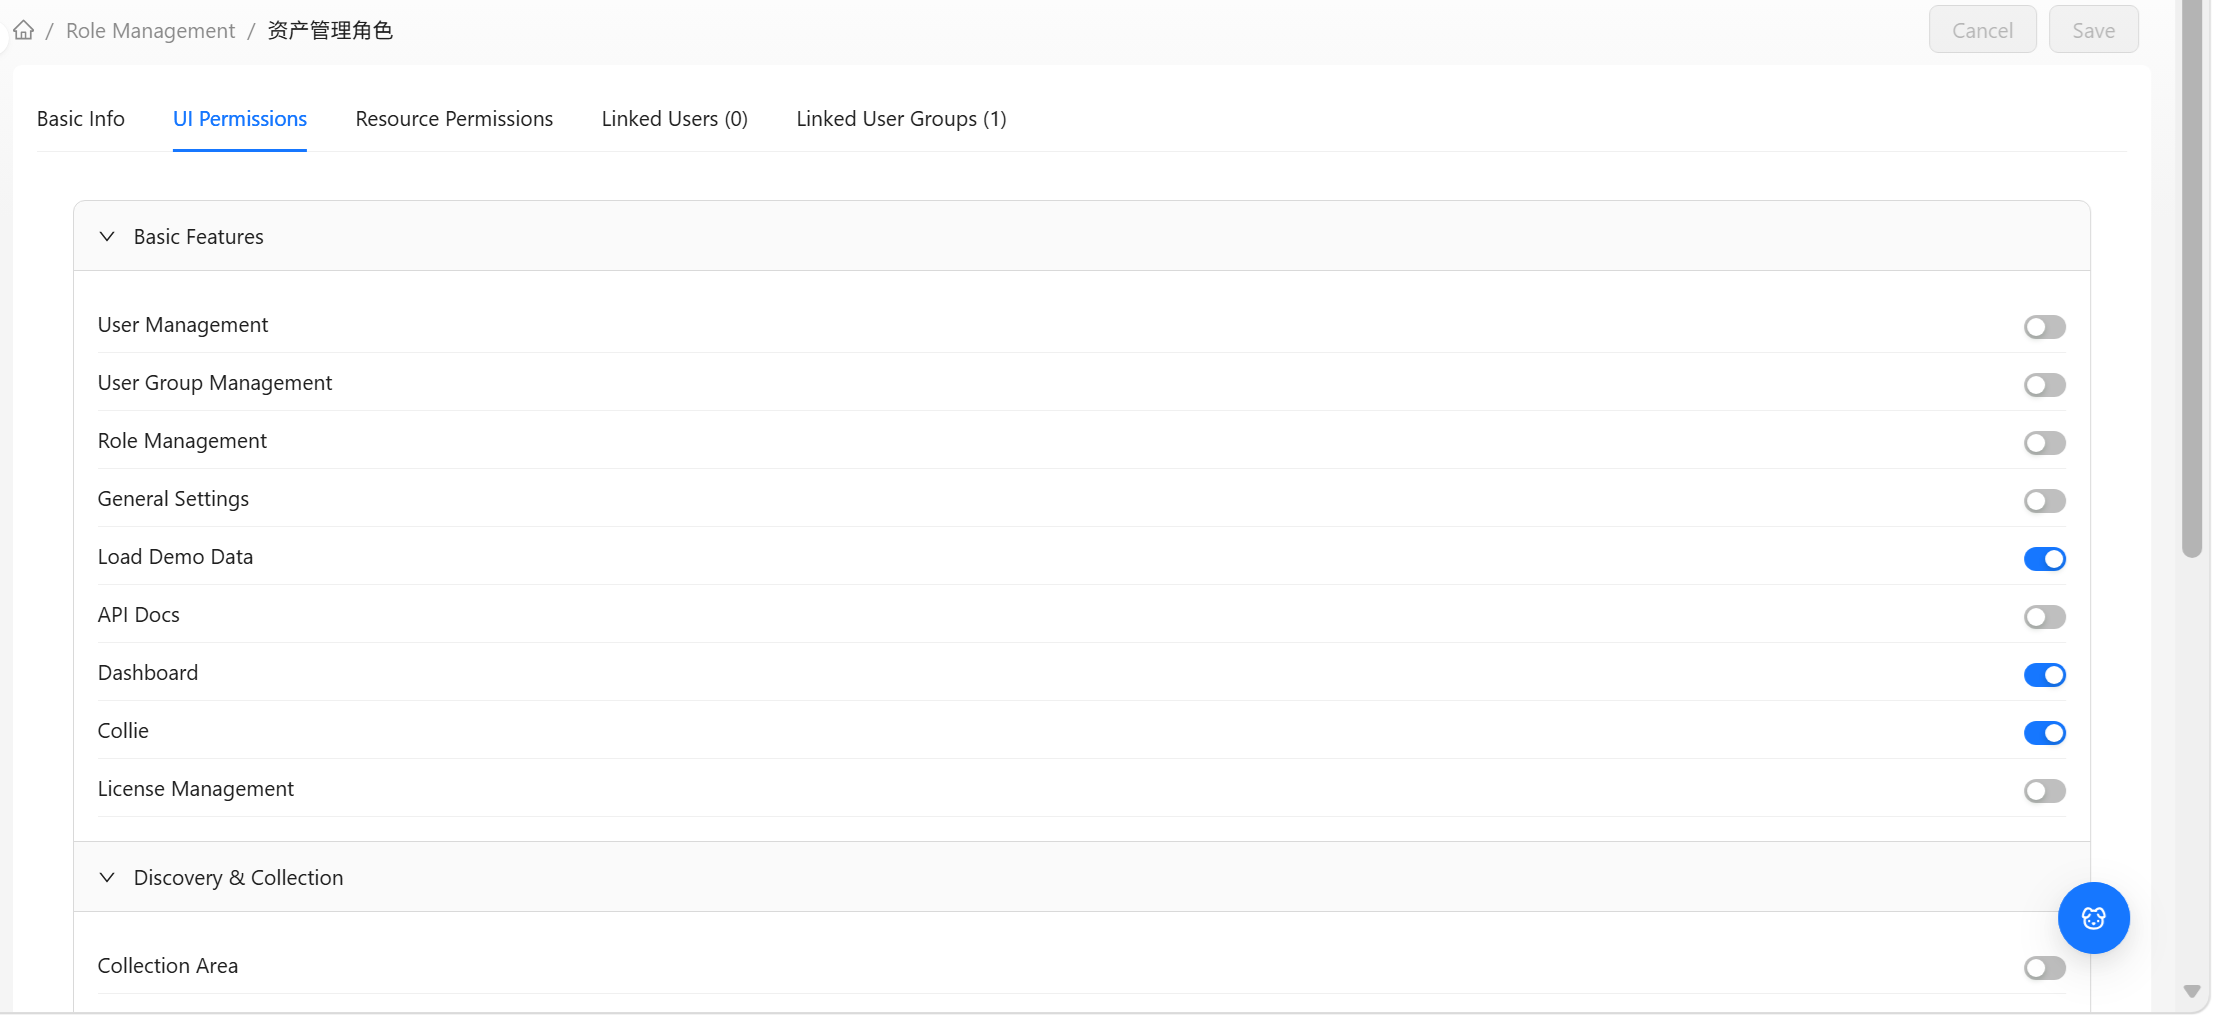
UI permissions (also known as menu permissions) control: which menus users with this role can see in the left navigation after logging in. Each item is a toggle switch; enabling it makes that menu visible.
Permission Groups
UI permissions are displayed grouped by functional module (all expanded by default):
| Group | Included Menus |
|---|---|
| General Features | User Management, User Group Management, Role Management, General Settings, Load Sample Data, API Documentation, Dashboard, AI Assistant |
| Discovery & Collection | Collection Region, Collection Point Rules, Collection Points, Collection Templates, Collection Agents |
| CMDB Features | CI Catalog, CI List, CI Topology View, CI Types, CI Relationship Types, Option Lists, Query Studio |
Enabling a menu only means the user can see that entry. Whether they can actually operate on the data within depends on the settings in the "Resource Permissions" tab. For example: enabling the "CI Types" menu + granting "Read-Only Access" means the user can see the menu but can only view, not modify.
For the full mapping of menu items and groups, see Permissions Reference - UI Permission Items.
Configuration Method
Toggle each item individually: enabled (visible) / disabled (invisible). You can adjust multiple items across groups and then click Save at the top to submit all at once.
Resource Permissions
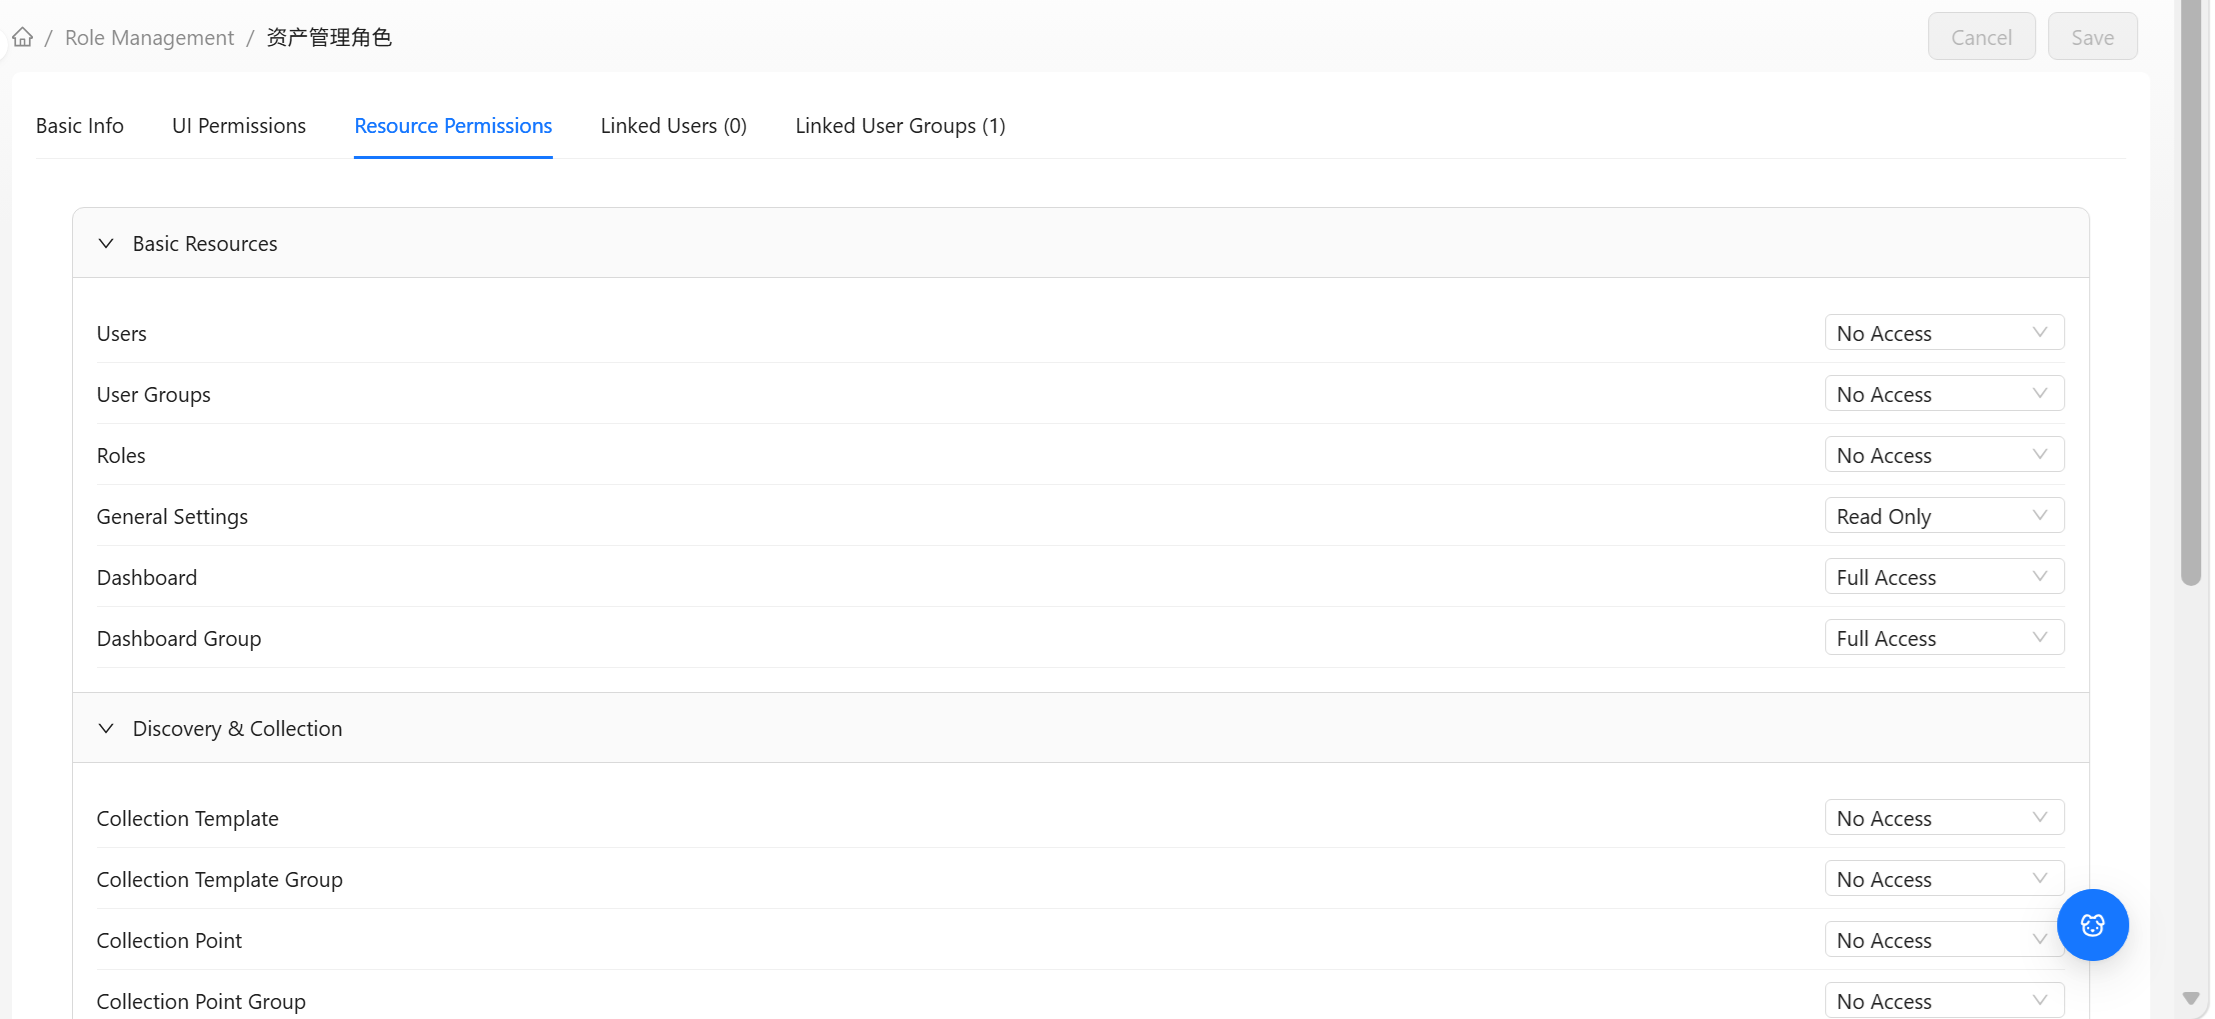
Resource permissions control: what level of operations users with this role can perform on each business resource. Each resource has three access levels.
Access Levels
| Level | Description |
|---|---|
| No Access | No permission at all; cannot view or operate on the resource |
| Read-Only Access | Can view; cannot create, modify, or delete |
| Full Access | Can view, and can also create, modify, and delete |
Resource Groups
Resource permissions are grouped by category (all expanded by default):
| Group | Included Resources |
|---|---|
| General Resources | Users, User Groups, Roles, General Settings, Dashboards, Dashboard Groups, AI Assistant |
| Discovery & Collection | Collection Templates, Collection Template Groups, Collection Points, Collection Point Groups, Collection Regions, Collection Point Rules, Collection Agents |
| CMDB Resources | CI Types, CI Relationship Types, Option Lists, Configuration Items, Queries, Query Groups |
For the full mapping of resource items and groups, see Permissions Reference - Resource Permission Items.
Configuration Method
Select an access level from the dropdown for each item. You can adjust multiple items across groups and then click Save at the top to submit all at once.
Associated Users
The Associated Users tab lists users directly assigned this role. The total user count is displayed after the tab name (e.g., "Associated Users (8)").
This list shows directly assigned users. Users who inherit this role through user groups are not counted here.
Associated User List
For common table operations such as column management and density, see Data Table Common Operations.
| Column | Description |
|---|---|
| Username | User's login name |
| Display name | User's full name |
| User's email | |
| Source | Direct (directly assigned) or inherited from user group (from an associated user group) |
| Actions | Remove this user (only available for direct source; requires edit permission) |
Search
Search by username, display name, or email in the search area.
Adding Users
- Click the Add User button in the toolbar to open the dialog
- The dialog lists users who do not yet directly have this role (those who already have it directly are not shown; multi-select is supported)
- Check the users to add
- Click Add to submit
A "User added successfully" message will appear. This operation takes immediate effect; no Save is needed.
Removing Users
- Single removal: Click the remove icon in the Actions column of that row, then click Confirm in the confirmation dialog
- Batch removal: Select multiple users and click Batch Remove Users in the toolbar, then click Confirm in the confirmation dialog
If a removed user inherits this role through a user group, the permissions are retained.
If the "Source" for a row is "Inherited from user group," it means the user obtained this role through a user group and cannot be directly removed here. You need to go to the corresponding user group's details to disassociate the role, or remove the user from that user group.
Associated User Groups
The Associated User Groups tab lists user groups associated with this role. All members of these user groups will inherit this role's permissions. The total user group count is displayed after the tab name (e.g., "Associated User Groups (3)").
Associated User Group List
| Column | Description |
|---|---|
| Group name | User group name |
| Description | User group description |
| Actions | Remove association (requires edit permission) |
Search
Search by group name in the search box.
Associating User Groups
- Click the Associate User Groups button in the toolbar to open the dialog
- The dialog lists user groups not yet associated with this role (those already associated are not shown; multi-select is supported)
- Check the user groups to associate
- Click Add to submit
A "User group associated successfully" message will appear. This operation takes immediate effect; all members of the group immediately inherit this role's permissions.
Removing Associations
- Single removal: Click the remove icon in the Actions column of that row, then click Confirm in the confirmation dialog
- Batch removal: Select multiple user groups and click the corresponding button in the toolbar, then click Confirm in the confirmation dialog
After removing an association, if members of those user groups are directly associated with this role, their permissions are retained.
Complete Workflow for Configuring a New Role
The typical steps to create and put a new custom role into use are as follows:
- Create the role: In the Role Management list, click Create and fill in the name and description
- Enter details: Click the new role name to enter the details page
- Configure UI permissions: In the "UI Permissions" tab, check the menus this role should see
- Configure resource permissions: In the "Resource Permissions" tab, set the access level for each resource (No Access / Read-Only / Full)
- Save: Click Save at the top to apply the permissions
- Assign: In the "Associated Users" or "Associated User Groups" tab, assign this role (can also be assigned from the user/user group side)
Before configuring, think about the role's purpose (e.g., "network administrator responsible only for maintaining configuration items"), then check the minimum required menus and resources according to the principle of least privilege. Once you have configured a "standard role," it can be reused across multiple users or user groups.
Frequently Asked Questions
Q: What is the difference between UI permissions and resource permissions?
UI permissions control whether a menu is visible (whether the entry point can be seen); resource permissions control the level of operations on resources (whether the user can actually perform operations). These are configured independently and should be used together: when you enable a menu, you typically also need to grant at least "Read-Only Access" for the corresponding resource; otherwise the user can see the menu but cannot do anything after clicking into it.
Q: Why can't some resources be set to "No Access"?
These are system-preset core resources (General Settings, CI Types, CI Relationship Types, Option Lists, Configuration Items). The platform's normal operation depends on them, and the system guarantees at least read access.
Q: If a user obtains the same role through both direct assignment and user group inheritance, will it be double-counted?
No. User counts and user group counts are tracked independently. The "Associated Users" list will display the user once, and the "Source" column distinguishes whether it is direct or inherited.